
Plaster is one of the most common wall finishes found in homes, especially in older buildings and traditional constructions. It gives walls a smooth, solid surface that can be painted or decorated easily. However, over time, walls can develop cracks, holes, damp patches, or surface flaking. This is where Plaster Repair becomes essential for maintaining both the appearance and strength of your walls.
Damage to plaster can happen for many reasons. Natural house settling often causes small cracks, while moisture can weaken the plaster and lead to bubbling or crumbling. Accidental impacts, such as moving furniture or door handle hits, can also create visible damage. Even temperature changes can expand and contract wall surfaces, leading to fine lines and fractures.
Understanding the importance of Plaster Repair helps homeowners prevent minor issues from becoming serious structural problems. When plaster is ignored, cracks can widen and allow moisture to seep in, which may damage the underlying wall structure. This can lead to costly repairs later. By addressing issues early, you keep your walls strong, clean, and visually appealing.
A well-repaired wall not only improves the look of your home but also increases its value. Smooth walls create a clean foundation for painting or wallpapering, ensuring a professional finish that lasts longer. That is why learning how plaster damage happens is the first step toward achieving long-lasting repair results.
Essential Tools and Materials for Plaster Repair
Before starting any Plaster Repair project, it is important to gather the right tools and materials. Having everything ready makes the process smoother and helps achieve a professional-quality finish. Even small repairs require proper preparation to avoid uneven surfaces or weak bonding.
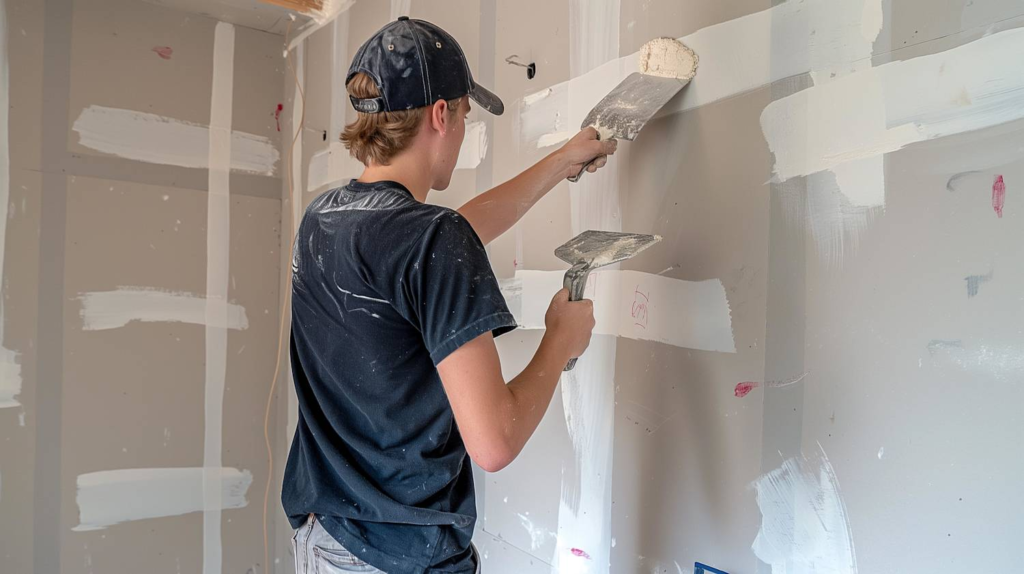
The basic tools needed include a putty knife, trowel, sanding block, mixing bucket, and a hawk board for holding plaster. These tools help in applying, shaping, and smoothing the plaster effectively. A clean sponge and a dust brush are also useful for preparing and cleaning the damaged area before applying any material.
In terms of materials, you will need a plaster mix or joint compound depending on the type of wall you are repairing. Some repairs may also require a bonding agent or primer to help the new plaster stick firmly to the old surface. Water is used to mix the plaster to the right consistency, which should be smooth and free of lumps for easy application.
Proper preparation is a key part of successful Plaster Repair. The damaged area should be cleaned thoroughly to remove loose debris, dust, or old flaking plaster. If the surface is damp or oily, the new plaster may not adhere properly, leading to future cracks or peeling. In some cases, slightly enlarging the crack or hole can help the new plaster grip better.
Using high-quality materials ensures durability and a smoother finish. While it may be tempting to use cheaper options, investing in reliable plaster products can significantly improve the final result and reduce the need for future repairs.
Step-by-Step Process for a Smooth Plaster Repair
A successful Plaster Repair project requires patience and careful attention to detail. The process begins with preparing the damaged area. This means removing all loose plaster, cleaning the surface, and ensuring it is dry and stable. A clean base is essential for strong adhesion and a smooth finish.
Once the area is ready, the next step is applying a bonding agent if needed. This helps the new plaster stick firmly to the old surface. After that, the plaster mix is prepared according to instructions. It should have a creamy, smooth texture that is easy to spread but not too runny.
The plaster is then applied using a trowel or putty knife. It should be pressed firmly into the damaged area to fill all gaps completely. For deeper holes, it is often better to apply plaster in thin layers rather than all at once. This allows each layer to dry properly and reduces the risk of cracking.
After applying the plaster, the surface should be smoothed carefully. This step is very important in Plaster Repair because it determines how even the final wall will look. Gentle strokes with a trowel help blend the repaired area with the surrounding surface. If needed, a slightly damp sponge can be used to refine the texture.
Once the plaster has dried, sanding is done to create a perfectly smooth finish. Fine-grit sandpaper works best for this stage. After sanding, the wall is ready for painting or decorating. A primer coat is often recommended to ensure even paint absorption and a professional appearance.
Following each step properly ensures that the repair not only looks good but also lasts for a long time without cracking or peeling.
Common Mistakes to Avoid in Plaster Repair
Many people make simple mistakes during Plaster Repair that can lead to poor results or repeated damage. One of the most common errors is skipping surface preparation. If the wall is not cleaned properly, the plaster will not stick well and may fall off over time.
Another mistake is mixing plaster incorrectly. If the mixture is too thick, it becomes hard to apply and may not bond well. If it is too thin, it can weaken the repair and lead to shrinkage cracks. Getting the right consistency is essential for a strong finish.
Applying too much plaster at once is also a frequent issue. Thick layers take longer to dry and are more likely to crack. It is always better to build up the surface in thin layers and allow proper drying time between applications.
Some people rush the drying process by using heat sources like heaters or hair dryers. This can cause uneven drying and surface cracks. Natural drying at room temperature is always the safest approach for Plaster Repair.
Skipping sanding or finishing touches is another mistake that affects the final appearance. Even if the plaster looks fine at first, small imperfections become visible after painting. Proper sanding ensures a smooth and professional finish.
Avoiding these mistakes can make a significant difference in the durability and appearance of your repair work.
Expert Tips for Long-Lasting and Professional Results
Achieving high-quality results in Plaster Repair requires more than just basic application skills. Professionals follow certain techniques that ensure strength, durability, and a flawless finish. One important tip is to always match the new plaster thickness with the surrounding wall. This helps maintain a uniform surface and prevents visible patches after painting.
Another expert tip is to always use a primer before painting the repaired area. Primer helps seal the surface and improves paint adhesion. Without it, the repaired section may absorb paint differently, creating uneven color tones.
Keeping your tools clean throughout the process is also important. Dried plaster on tools can affect application smoothness and create unwanted marks on the wall. Cleaning tools regularly ensures better control and precision during application.
Humidity and temperature also play a big role in Plaster Repair success. Working in a dry, stable environment helps plaster cure properly. High humidity can slow drying, while extreme heat can cause fast drying and cracking. Maintaining balanced conditions ensures better results.
For deeper damage, reinforcing the area with mesh tape can provide extra strength. This is especially useful in cracks that tend to reappear. It helps hold the plaster in place and prevents future movement.
Finally, patience is key. Rushing any step in the repair process often leads to weak or uneven results. Taking time to prepare, apply, and finish each layer properly ensures a smooth, long-lasting surface that looks professionally done.
Conclusion
Plaster Repair is an essential skill for maintaining strong, beautiful, and long-lasting walls. By understanding the causes of damage, using the right tools, following proper techniques, and avoiding common mistakes, anyone can achieve smooth and professional results. With patience and attention to detail, even damaged walls can be restored to a flawless finish that enhances the overall appearance of any space.
